Showing posts with label Halloween Quilts. Show all posts

Friday, October 19, 2018

Halloween Finishes 

Halloween is fast approaching!  
 I have made 3 new Halloween quilts this year!
Lots of my Ghastlie fabric collection is 
looking good in a quilts, rather than sitting on a shelf!

I used the these first 4 lines of Ghastlies fabric.


Ghastlies Peep Show
I used the Thimbleblossoms "Red Velvet" pattern
with a couple X blocks revised to my liking.


The backing (and binding) is a green/black Halloween print 
I have had in my stash for several years.
Stash pink and gray prints / most of them Ghastlie prints.
Green border is KONA and I bought it.

I had a few 8 1/2" focus fabric squares of fabric cut
so I made some black and white dot squares...
Fun piano key FMQ on the black and green borders.


and made this insert for the backing.
The quilt finished at .


The second Ghastlie quilt was made using the
2017 Ghastlies Moments panel cutting 5 1/2" squares!
Added lots of stash solids and Ghastlie prints.


 Mathilde Ghastlie is just awesome!
A fun sharp-angled FMQ quilt design on this one!

Back was a combo of larger stash FQs and Ghastlie fabrics
(remember I am using stash fabrics)

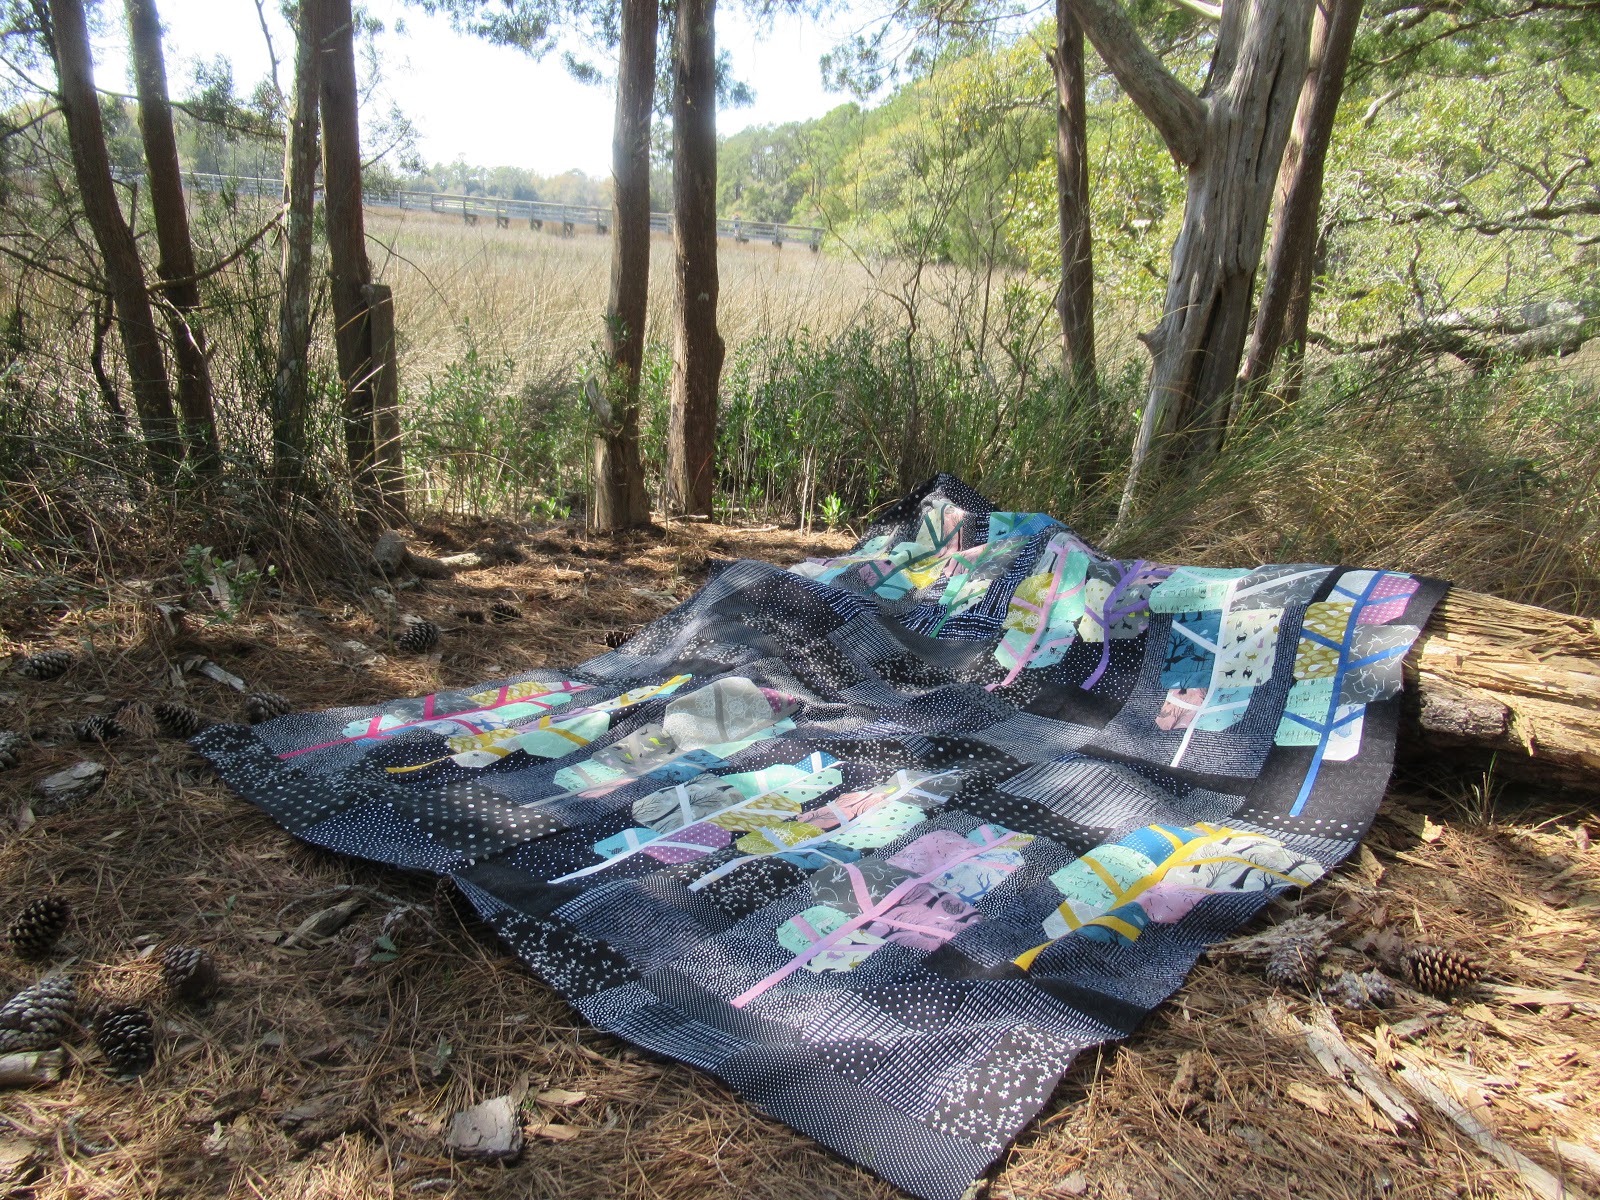
Next up is a Blue Nichols Quilt Pattern
My stash of Cotton and Steel fabric
"Spellbound and Boo" 
Stash black, gray prints for the backgrounds 
and GRUNGE tree trunks
I deviated from the pattern's two horizontal rows
and made the top symmetrical for my...
"Haunted Forest"


The backing is yardage from Zen Chic's COMMA line
that I had hoarded for a long time.


I had some C&S Halloween prints left
so a horizontal row along the bottom part of the quilt
added a pop of color.


All 3 of these quilts were long arm quilted by 
Michelle Mayton in Mansfield Ohio.

I have one more Ghastlies quilt sent to my friend
and fellow guild member for
Central Ohio Modern Quilters
and, Columbus Modern Quilters. 
Cassandra is making great quilts and accolades
and I am lucky to have her quilt this one for me.
Check out Cassandras blog here

I will have a full post on this quilt once it is completed.
but for now..a sneak peek!


I hope this post will inspire you to 
GO ON and CUT THE DAMN FABRIC!
Use it...you will be glad you did!

Tell me, what is your favorite Halloween fabric?


Wednesday, April 18, 2018

I PAINTED A FOREST

I hope you read the post showing
how I made my Painted Forest quilt top.
I used Cotton and Steel Spellbound and Boo 
fabrics for the tree leaves
Grunge tree trunks and limbs
Black filled the background from my stash!

I had passed Vereene Memorial Garden many times 
as I drove around South Carolina!


 I had no idea what would embrace me
beyond the entrance but, 
I knew a there was a chance it that needed my
"Painted Forest" quilt.


Friday, April 13, 2018

DON'T GO INTO THE FOREST!

...unless its my Halloween forest!
This pattern "Painted Forest" is designed by
Scott Hansen at Blue Nickels Studio

Today is Friday the 13th so its a perfect time
to show you a Halloween quilt!

It's full of fun Quirky and Spooky trees made with
Cotton and Steel Spellbound and BOO fabrics!
You will also find a bit of Grunge in the tree trunks.


I was planning my winter hiatus and I needed to cut 
and kit these tree blocks.
Now that is NOT an easy chore!
Look at all the pieces for each block.


There is a Left Side and a Right Side of each tree.
No two trees have the same sections...
The hardest part of this pattern, for me, 
was keeping it all organized
You see, the cutting, layout and sewing instructions are on 
several different pages.
Flipping back and forth to know where I was, or should be,
was insane and made me want to run into a forest
and never come out.

However...she persisted!


I tried everything I could to make it easier.
Sticky notes were everywhere!


Keep in mind...there are two rows of trees.
So the fabrics cannot be the same
SIDE BY SIDE
OR FIRST ROW OVER SECOND ROW

Get where I'm coming from?
I had finished 3 or 4 blocks before I left home.

I took pictures of everything and 
using my iPad "mark up" capability
I wrote numbers on the pictures to keep it all in order. 
and then grouped then with what might be
blocks on first row
blocks on second row


I used Black and white fabrics from my stash
 for the background because...
It's a Halloween quilt and a dark forest is a must!


As I built the blocks I soon realized I needed a place 
to measure them sew I can trim them all to the same size.
  Small condo, sew the kitchen counter had to be my work table
I had a plastic measuring tape and some scotch tape in my
mobile sewing box so I set up this measuring area.
By taping down the tape measure!


Many hours later and lots of patience...
I had the 14 blocks finished and on a design wall !
Looks pretty good!


But trees all in a row????
DO NOT work for me!
So I played and played until I was happy with
this asymmetrical design of the forest!


Now...fill in the background pieces
using the fabric I had with me....
PLEASE let it be enough!
Impromptu technique..building it out, one piece at a time.


BOTTOM Section is more complicated.
I have to build this out on the top and the bottom!


Finally the top is designed and sewn!


The Painted Forest quilt top finished at 57" x 69"
WOW...that's a big forest to get lost in
(or under)

This was the most challenging quilt top I have made
in a very long time.   It was worth every hour I spent on it!
Scott, the pattern designer, even likes it!

When I get home I will...
1) make the backing
2) a quilting design
3) will I quilt it?
4) make a scrappy binding.
Scrappy perhaps?

Stay tuned for a post full of fun pictures 
of My Spooky Painted Forest
in the wild...


Sunday, March 11, 2018

A GHASTLIES PEEP SHOW!


Working with Ghastlies fabric is tricky 
because its a large novelty print.
Like these older Ghastlie prints I selected for this top!
With shaking hands I "finally" cut them!
 No one see these awesome fabrics
if sitting on a shelf collecting dust!


The pattern I selected was Thimble Blossoms
"Red Velvet" which has big main blocks!
I also must give credit to my friend, Kim Hensley
who first used this pattern for her Ghastlies fabric.

Image result for thimble blossoms pattern red velvet

If you look closely the outside blocks in the layout
are not X blocks...just partial. 
My variation on this pattern, was my hubby's idea,
 to make all X blocks!
I love when he looks at my work and offers great input. 
He has been watching me sew for a very long time
and often sees things, I don't!
He also thought the main blocks looked like windows 
and named this quilt...

"Ghastlies Peep Show"
(he is a lot of fun, ya know)


Here are the fabrics I selected from my stash
for background and accents.


Then cut and kitted all the pieces for my winter hiatus
trip to Ocean Isle Beach, NC
Lots of  4 patch blocks


Add corner pieces BEFORE you sew them together
to make X blocks.  (a'hem)


The pattern calls for one main block to be 
"accented" with a fabric that pops.
I choose a Kona green!


The same green is used in the border!
Oh yes...this is gonna be amazing!


Lots of fussing around on the design board 
...before I sew it all together


and pressing each row as I go
makes this Ghastlie Girl happy!


Finally the "Ghastlies Peep Show" top is finished 
and ready for a beach photo op!
This beach house reminded me of Widows Peak!


The beach sand bags always make a great prop!


I try to get shots from many angles


Sand dune fences make amazing quilt racks...


The Inter Coastal Waterway is close by
and I am not afraid to tresspass for a photo opp!


I will climb lots stairs to get that perfect shot!


In May, I have a quilt retreat and I'll make a backing for it.
I have LOTS of Ghastliness fabric I can use. 
My goal is use it NOW! 
The pink and gray Ghastlies colorway is what
drew me into the Ghastlie world in 2009
and look...it still delights me in 2018

Sew tell me...would you tresspass to take
that perfect photo?  🙋