Nothing bugs me more than a beautiful quilt
with crappy looking binding!
SEW here's a tutorial on how I
make the pretty mitered corners on binding!
My binding are all 2 1/2" wide
Piece strips with angled seams for less bulk.
1/4" foot with a guide
***Where ever you begin sewing down the binding...
LEAVE a loose 10" tail for a mitered binding finish.
(That will be a separate tutorial)
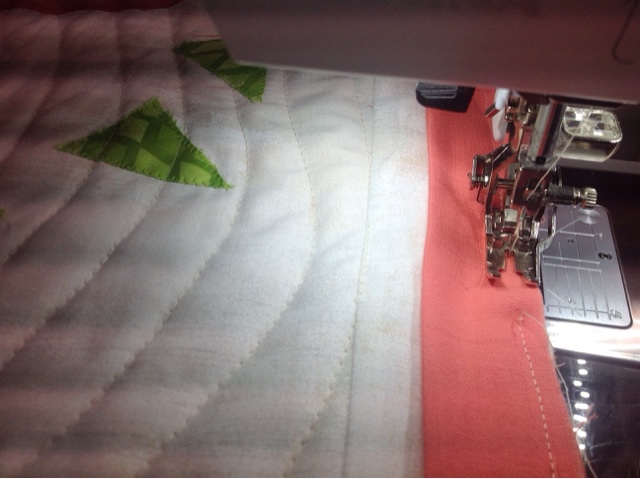
Sew binding down the side of the quilt, aligning raw edges
STOP the needle 1/4" from the edge of the quilt
TURN the quilt 45 degrees (clockwise)
and sew STRAIGHT OFF the edge of the quilt.
Like this!
Here's a close up view.
TURN the entire quilt (quarter turn counter-clockwise)
Raw edge of quilt always to the right side.
FOLD the binding straight back
MAKE a 45 degree angle fold and finger press
Like this...
Bring the binding strip forward, straight down along and
on top of the right side of the quilt and finger press.
DO NOT loose the 45 degree fold....as you do this.
Begin the 1/4" seam again...at the top edge of
the binding and quilt corner
DO NOT LOOSE THE 45 degree fold at any time
Continue sewing 1/4" seam
REPEAT this process, for each corner.
Now lets talk Mitered Seam Finish..
Don't loose me here...its not hard.
I have posted about this technique before and you
or stay right here...
Leave a loose 10" tail at the beginning of
sewing down the binding
Leave a 10" loose tail at the beginning strip of the binding.
Start sewing at the 10" mark, back stitch to secure.
Sew all the binding on around the quilt.
When you get to the last edge of the quilt....
STOP sewing when there is 10" of space, back stitch
Then cut another 10" tail.
Now your binding has two tail and a 10" space
between the loose tails.
Pull down the tails toward each other, pin them down snugly.
This is important to get a tight binding finish
Fold back each tail (right and left sides)
Leave a snug 1/4" space between the tails.
Trim each tail to 1 1/4" out from each FOLD
(keep that 1/4" space centered)
The 1 1/4" trim on either side is half of the 2 1/2" binding width.
Now THIS is the tricky part. Fold the ends as if you were
sewing binding strips Right SIDES together.
Sew across at a diagonal...
just like sewing the binding strips together.
Lay the sewn piece out flat to make sure it is NOT twisted BEFORE you trim off to 1/4" seam!!!
Now flatten it out, press and sew it down to finish your binding.
THIS is the flat, mitered seam finish.
trim off any dog ears as needed.
I prefer to "hand sew" the bindings
for a beautiful finish.
I have yet to see a machine sewn finish that looks pretty?
FLORENCE the Party Animal...shes been framed!
Let me know if you give these techniques a try
and how they work for you!