Tuesday, May 29, 2018

BACK BREAKING BACKS?

Do enjoy making backs for you quilts?  
Do you challenge yourself to use fabric in your stash?

I think 1 fabric backs are boring!
I dug thru my stash and found several yards 
of a print I had forgotten all about.
I bought this several years ago and stored it
with a bunch of Halloween prints.


Its quite perfect for  
"The Ghastlies Peep Show"
It's the SAME green that I have in the border of the top
I believe our minds
remember the colors we love!


I was at quilt retreat, and before the tables filled up,
I used that space to make several quilt backs.
THIS my friends is how NOT to hurt your back
making backs!
  
Follow along for a simple way to get creative with your backing.

I had some left over 8 1/2' squares not used on the quilt front. 
I laid them out and made 8 1/2" squares of black polka dot fabric.
Sewed them all into a checkerboard piece!


To that piece I added side pieces of the backing fabric.

Always extend your quilt back a few inches 
beyond the "width" of your quilt.  
Add 5 or 6" to both the top and bottom to for length.
Long arm quilters will thank you for that!


Take a closer look at the side pieces and top piece
sewn to the checkerboard piece.
I did have to piece this top section piece 
to make it the width needed.


Here's a better look...both sides and the top piece 
all sewn and laid atop on top of the Peep Show top. 
I'm half done with the backing!


Then I laid the yardage left on the top, letting it hang over.
Easy cutting while it hung over...I snipped a start and then used my
rotary cutter and mat to get a clean even cut.


Here you can see the seam, as  I needed two pieces, 
sewn together to make the bottom section.


TaDa! All done!
Simple, yet an unexpected, fun surprise
and I was able to incorporate  left over blocks
from the front of the quilt!


The back...


I hung them both on a back wall for a final look. 
This quilt is gonna be quilt Ghastlie!


You can get quite creative....
Sometimes I pull FQs and sew them together.
Sometimes I use up pieces of yardage!
I always try to pull something from the front
into the backing.
It's all up to you and your creative journey!
Try it and let me know how it works for you!

When I get "The Ghastlies Peep Show" back from the quilter...
I'll take some great photos and post about it again.
til then...stop dont' break your back...
create it!


Sunday, May 13, 2018

MOTHERS DAY BAG!


Image result for happy mothers day pics

My Mom has been gone 11 years and I miss her
everyday...My son lives 12 hours away and
I miss him everyday. 

But today I want to share a sweet Mother's Day story

Gemma, my 7 year old great-niece
 was recently spending a day with me.

Aunt Kathy, "Can we sew?"
Sure, but so you understand the sewing machine
is not a toy and we will make a project.

"OK"

She picked some fabrics to make her 
Mommie a Mothers Day Gift


Lessons are in order when she sews with me.
I want to teach her to "love" sewing.
I showed her...
How to determine the right side and wrong side of fabrics.
How to place fabrics RST 
How to  pin the two pieces for sewing the seams
(flip them over and make sure the pin catches both fabrics
and the edges are totally lined up)


Now at the sewing machine, more lessons.
How to line up the seams against the pressure foot toe guide.
To watch the pressure foot guide....NOT the needle
to keep the fabrics against it and have a nice
1/4" seam while gently guiding the fabric.


Important lesson:
Keep those fingers away from the needle area.
And she used the back stitch button.


We had 6 fabrics and 5 seams to make the drawstring pouch
with exterior and lining.
I cut the fabrics...she sewed the seams...
pulling out the pins and NOT sewing over them.
I pressed the seams.

She concentrated, while Aunt Kathy 
gave lots of encouragement and hugs!
"proud of you" may have been overused!


She watched as I cut the corners to "box the corners"
and she sewed the corner sections together.
She turned it inside out and thought using the
"chop stick" to poke out corners was quite fun!


She was tired by now so I suggested, "IF she didn't mind,
I would make the casing and the drawstrings
and she could just watch!

She top stitched the top and saw how the 
"open arm" works on the machine.
I put in the drawstrings, she said that they were
too hard to scoot thru.

And THIS is the final bag!


And when it was all said an done...
she was a happy little girl!
She did get restless but she finished it because...
UFOs are not a good lesson!  😉


I was a very proud "Aunt Kathy"


I hope Gemma will continue to want to "sew"
I have "sew" much to teach her!
I told her not many 7 year old kids can say
they sewed their Mama's Mothers Day gift!

I hope your Mothers Day is perfect in every way!


Saturday, May 5, 2018

WHO SHARES YOUR BIRTHDAY?

A good friend told me, at a recent birthday gathering,
that her sister was a first time grandma!
The baby boy was born on my birthday.

Without a moments hesitation I said,
"I must give him one of my quilts".

Arthur Jack Good was born May 1 2018
I was born May 1, 1951

I made this quilt several years ago.
It has been in a storage tub, just waiting for the 
perfect baby to receive it!


Alexander Henry car fabrics...
but I don't remember the name.

''

And the backing was stash fabric
and worked out just fine.


I used a brown thread for a meandering FMQ design.
And addied some large ric rack as sensory tabs
for the baby to play with.


I used my Bernina text capability to add the baby's name 
and birthdate on the bottom right border.
My name is on the side border.
Makes a quick and easy label.


I also made a card that says...
You and Me....
...share the same birthday!
Added a little personal note inside for the baby
and why I gave him the quilt.


I may never meet "Baby Good", but that is not what matters.
I  "paid it forward" by giving a child a quilt!
Hopefully a cherished treasure for years to come.

And now my friend knows the answer to a question 
she has asked more than once. 
"What are you gonna do with all the quilts you make?
😊


Wednesday, April 18, 2018

I PAINTED A FOREST

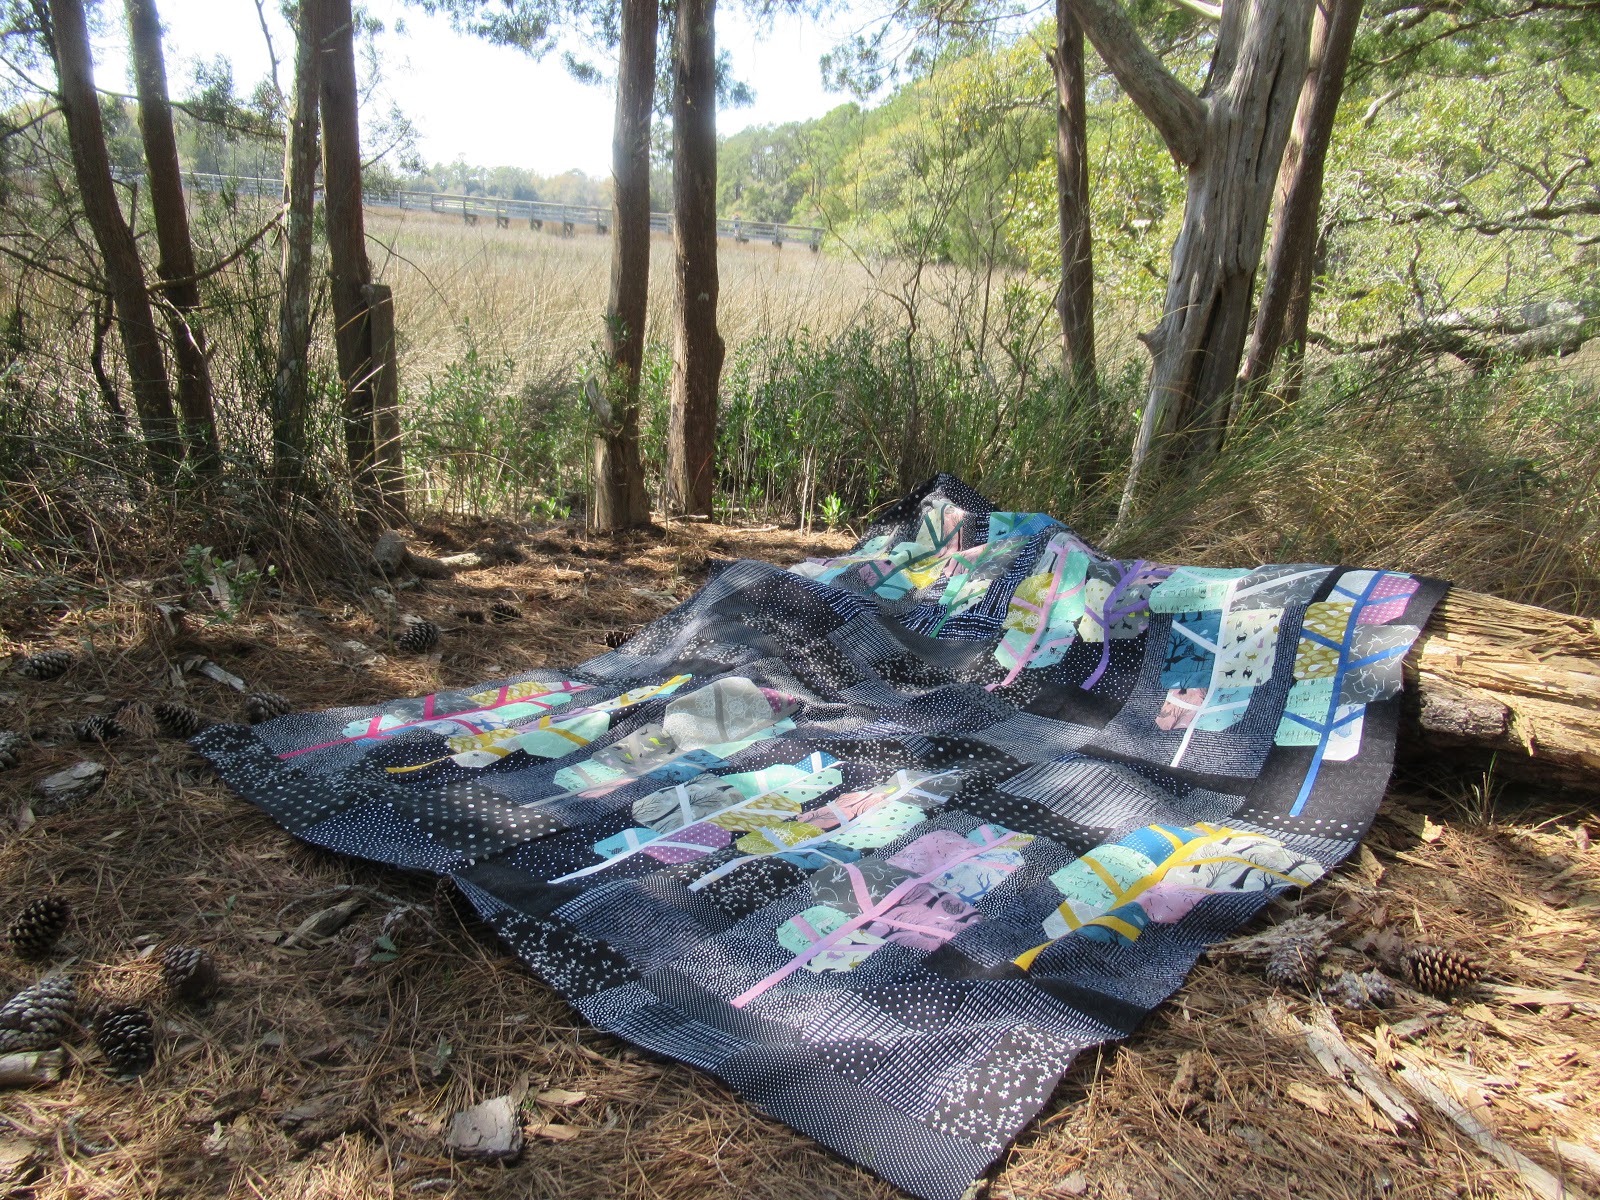
I hope you read the post showing
how I made my Painted Forest quilt top.
I used Cotton and Steel Spellbound and Boo 
fabrics for the tree leaves
Grunge tree trunks and limbs
Black filled the background from my stash!

I had passed Vereene Memorial Garden many times 
as I drove around South Carolina!


 I had no idea what would embrace me
beyond the entrance but, 
I knew a there was a chance it that needed my
"Painted Forest" quilt.


Friday, April 13, 2018

DON'T GO INTO THE FOREST!

...unless its my Halloween forest!
This pattern "Painted Forest" is designed by
Scott Hansen at Blue Nickels Studio

Today is Friday the 13th so its a perfect time
to show you a Halloween quilt!

It's full of fun Quirky and Spooky trees made with
Cotton and Steel Spellbound and BOO fabrics!
You will also find a bit of Grunge in the tree trunks.


I was planning my winter hiatus and I needed to cut 
and kit these tree blocks.
Now that is NOT an easy chore!
Look at all the pieces for each block.


There is a Left Side and a Right Side of each tree.
No two trees have the same sections...
The hardest part of this pattern, for me, 
was keeping it all organized
You see, the cutting, layout and sewing instructions are on 
several different pages.
Flipping back and forth to know where I was, or should be,
was insane and made me want to run into a forest
and never come out.

However...she persisted!


I tried everything I could to make it easier.
Sticky notes were everywhere!


Keep in mind...there are two rows of trees.
So the fabrics cannot be the same
SIDE BY SIDE
OR FIRST ROW OVER SECOND ROW

Get where I'm coming from?
I had finished 3 or 4 blocks before I left home.

I took pictures of everything and 
using my iPad "mark up" capability
I wrote numbers on the pictures to keep it all in order. 
and then grouped then with what might be
blocks on first row
blocks on second row


I used Black and white fabrics from my stash
 for the background because...
It's a Halloween quilt and a dark forest is a must!


As I built the blocks I soon realized I needed a place 
to measure them sew I can trim them all to the same size.
  Small condo, sew the kitchen counter had to be my work table
I had a plastic measuring tape and some scotch tape in my
mobile sewing box so I set up this measuring area.
By taping down the tape measure!


Many hours later and lots of patience...
I had the 14 blocks finished and on a design wall !
Looks pretty good!


But trees all in a row????
DO NOT work for me!
So I played and played until I was happy with
this asymmetrical design of the forest!


Now...fill in the background pieces
using the fabric I had with me....
PLEASE let it be enough!
Impromptu technique..building it out, one piece at a time.


BOTTOM Section is more complicated.
I have to build this out on the top and the bottom!


Finally the top is designed and sewn!


The Painted Forest quilt top finished at 57" x 69"
WOW...that's a big forest to get lost in
(or under)

This was the most challenging quilt top I have made
in a very long time.   It was worth every hour I spent on it!
Scott, the pattern designer, even likes it!

When I get home I will...
1) make the backing
2) a quilting design
3) will I quilt it?
4) make a scrappy binding.
Scrappy perhaps?

Stay tuned for a post full of fun pictures 
of My Spooky Painted Forest
in the wild...